|
|

|
Studying Mushrooms |
|
|
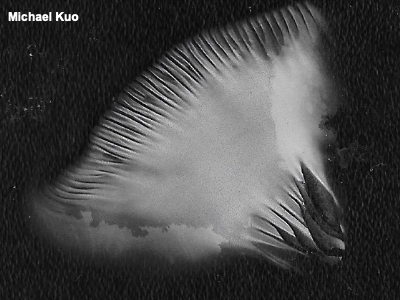
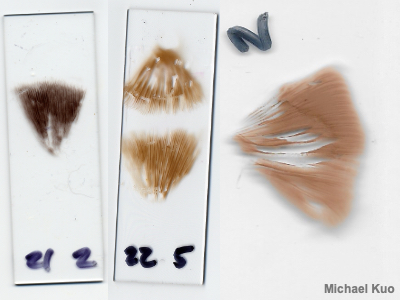
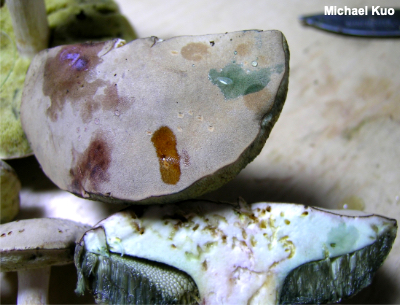
Making Spore Prints While a single mushroom spore can't be seen by the naked eye, a pile of many spores can—and the color of a mushroom's spores, seen en masse, is a crucial identification feature. Obtaining a mushroom's "spore print" is therefore an essential step in the identification process. Before going through the nuts and bolts of making a spore print at home, it is worth noting that mushrooms frequently make their own spore prints, in nature. If you have ever noticed colored dust covering a leaf or the ground beneath a mushroom's gills or pores, you have probably witnessed this phenomenon. Tightly clustered mushrooms, in fact, frequently leave spore prints on one another, since caps overlap. In order to make a spore print at home, you will need to have a relatively mature mushroom. Buttons, young mushrooms, and mushrooms with some kind of a covering over their gills or pores (a partial veil) are not likely to drop spores in order to make a print. Remove the stem from smaller mushrooms and place the cap, gills or pores downward, on a piece of paper or glass. For larger mushrooms, slice off a section of the cap and use only the section. Place a cup or glass upside-down on top of your mushroom, to keep air currents away—but if your mushroom section is fairly large, you may want to place a coin under the rim of the cup or glass, so that the section is not completely closed and air tight (which could lead to excess condensation). While some spore prints can appear within a few hours, it's often best to wait overnight, just to be sure. When you remove the cup and lift the mushroom cap, you should find a "print" like the ones illustrated to the left. If you have been careful not to move the mushroom while the print was developing, you may find that the spore print reflects the pattern of the mushroom's gills or pores, since the spores fell directly downward. Some field guides advocate using black paper for spore prints, since white prints show up more easily. Then again, brown and black prints don't show up on black paper as well as they do on white paper. I have solved this problem for myself by using glass, which can be held against light and dark backgrounds, rather than paper. In fact I usually use a microscope slide, since I will also be examining spores under the microscope—but if you are not going to be using a microscope, any (safe) piece of glass will suffice. The color of the spore print is what you will compare with descriptions from field guides and keys. Interpreting color can be very subjective—and mycologists have tried several times to "standardize" the interpretations, without much success. But while subtle differences (like, between "white" and "creamy") may be perplexing, distinguishing a white spore print from a brown one or a pink one is easy enough, and it will help you enormously in identifying a mushroom. More information (well, "a tirade" might be more accurate") on assessing colors, of spore prints and the mushrooms themselves, can be found on the page for the genus Russula. A note about "pink" spore prints. Mycologists use the descriptor "pink" where most of us would say something like "pinkish brown" or "brownish pink." The spore print of Pluteus americanus, illustrated to the left, is an example. Older literature even calls this color "flesh," which tells you something about diversity among mycologists. For mushrooms belonging to the Ascomycota, like the morels and false morels, a spore print is obtained using a similar method. However, since these mushrooms have tiny spore jets that forcibly eject the spores, you will place a piece of the cap on the paper or glass and expect the spore print around the mushroom section (as well as underneath it, if you have placed the spore-producing side downwards). |
|
|
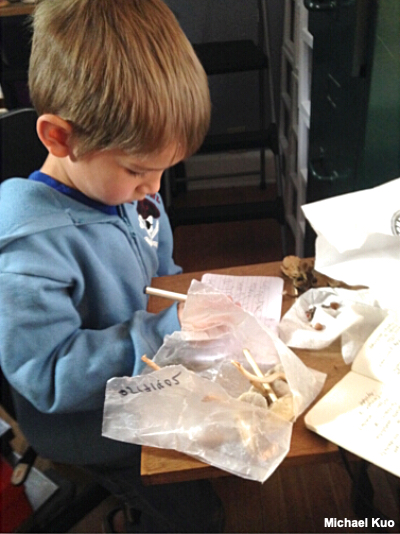
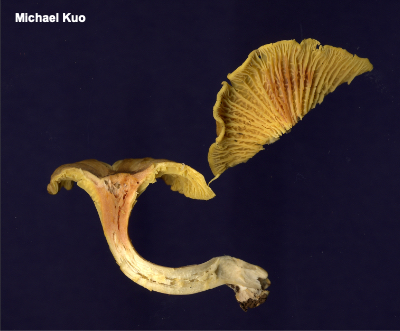
Describing Mushrooms and Keeping a Journal Many years of experience helping others (and myself) identify mushrooms have convinced me that the surest route to success is to keep a journal in which you carefully describe the mushrooms you find before you try to identify them with field guides, websites, or technical literature. It is a time-consuming process but it works best, since missing details and compromised objectivity are among the top causes of misidentification. People often read descriptions or look at photos of mushrooms first, and then turn to the mushrooms themselves. The result is that the mushroom's details are filtered by preconceptions and the power of suggestion. As an English teacher I have observed the way language, once it's in our heads, can easily prefigure the way we interpret things. If I ask my students to read Hamlet for Monday and be ready to discuss Hamlet's insanity, far more students will decide he is insane (as opposed to just pretending). The same principle applies to observation of mushroom details. You will want to work with your mushroom collections as soon as possible when you get back from the woods. Mushrooms decay fairly quickly, especially in warm weather, and you may be surprised at what you find in your collection bags if you wait too long. Set up spore prints for each mushroom, sort out your collections, number them somehow so you won't get confused about what corresponds to what, and write descriptions in your journal. You will probably want to begin each entry with the collection location and date, together with the ecological information you noted in the woods. Begin at the top of the mushroom and work downward, recording the details you observe. It is not, of course, imperative that you use this top-to-bottom approach, but since most mushroom guides describe their subjects in this order, comparing your description to other descriptions will be easier if you quell your rebel urges and follow the convention. It would not be productive for me to try to anticipate here every physical detail you might conceivably need to describe—and to be honest one of my goals is to force you to figure out for yourself what details are important in the identification process. If you are a beginner you will probably find that your written descriptions of mushrooms, at first, are missing some crucial details. A Lactarius, for example, cannot be accurately identified without reference to the color of its latex—a milky or watery juice exuded when the gills are damaged or the mushroom is sliced open. Who knew? Obviously, at first there will be a certain amount of going back and forth between your descriptions, descriptions in mushroom guides, and the mushrooms themselves. However, as you gain experience describing more and more mushrooms your descriptions will become more complete and the potential for subjective errors will diminish. When you have written your descriptions, you are ready to try identifying your mushrooms (though you may quickly discover you will need to wait for a spore print to develop before making much headway). |
|
|
Identifying Mushrooms After you have carefully collected your mushrooms and spent some time observing their features and recording your observations in a journal, you are ready to compare your descriptions with those found in mushroom guides. I believe it is important to have as many guides as possible at your fingertips. A list of field guides, websites, and beginning mushroom identification resources can be found here. The most efficient way to identify mushrooms is through scientific keys like those featured in several mushroom guides. If you have never used keys before, I am sure you will be able to figure it out on your own; a key asks you to make choices, one by one, in order to narrow down possibilities. My identification keys begin with the key to major groups of mushrooms. Unfortunately, however, many field guides lack keys and therefore encourage what is probably the least successful method for identifying mushrooms—namely, comparing them to photos. Photos almost never convey the many details that are important in determining a mushroom's identity, and users of field guides thus often wind up making determinations based on cap color and virtually nothing else. Color is one of the least reliable features of a mushroom! Also consider that most field guides depict and describe a few hundred mushrooms, at most, when there may be 10,000–30,000 species on the continent. Once you have used keys to arrive at some identification possibilities, carefully compare your description of the mushroom to the descriptions in mushroom guides. The process is a lot like fingerprint analysis, in which "points" of comparison are matched by forensic scientists or, these days, software applications. The mushroom you picked in the woods, like the fingerprint lifted carefully from the crime scene, must be matched to an individual in your database (your mushroom guides), and you have maintained your objectivity by describing the mushroom in your journal before reading the descriptions. I suppose now is not the best time to tell you that this identification process is going to fail a lot—even, perhaps, most of the time. There are several reasons for this, but suffice it to say that mushroom identification is difficult, often technical, and sometimes impossible. This is a hard nugget to swallow for those who have used field guides to identify trees or birds, for example, and expect the mushroom world to be equally easy to penetrate. One doesn't need a microscope to identify a North American tree, and plenty of field guides can be found that include more or less all the tree species native to the continent. With mushrooms, one does need a microscope, much of the time—and no one even knows how many thousands of mushroom species there are. However, with patience you will be able to identify some mushrooms, even if you are just starting out. And as your experience develops, you will be able to identify more and more mushrooms. If you become frustrated along the way, remember this: I have watched many of the continent's most prominent living mycologists study mushrooms and throw up their hands in despair without an identification—and the ones I have not seen fail like this are the ones I have never met. |
|
|
Determining Odor and Taste The odor and taste of a mushroom can be important in the identification process. I'm aware that you probably don't need me to tell you how to use your sniffer and your taste buds—but there are a few things you may want to keep in mind when it comes to smelling and tasting mushrooms. Odors I take a piece of the mushroom (or a whole cap, in the case of small mushrooms) and crush it between my finger and thumb before trying to assess an odor. Usually the cap is the best part of the mushroom to test, but occasionally you will discover that some other part of the mushroom should be tested (for example, the stem bases in Agaricus). Some people cannot detect certain odors; I can't smell the "phenolic" odor in Agaricus species, but I can sniff out "farinaceous" from yards away. Experience will tell you which odors you are best at detecting. "Not distinctive" is probably the most common mushroom odor, but distinctive smells include:
Taste To determine a mushroom's taste, tear off a very small piece of the cap (including flesh as well as gills or pores). Put it on the tip of your tongue, and hold it in your mouth for a few seconds (perhaps a little longer in the case of Lactarius and Russula mushrooms, since some of their tastes develop slowly). DO NOT SWALLOW, and try not to trip over anything. Spit the mushroom out, and rinse your mouth out thoroughly with water, being careful not to swallow. Since there are some deadly poisonous mushrooms out there, you should be careful when it comes to tasting mushrooms. One swallowed bite of the wrong mushroom could contain enough poison to kill you. It is best to be conservative in matters like this—and bear in mind that taste is only one of many features that can help you identify a mushroom.
|
|
|
Pronouncing Latin and Greek Names Oh, who cares? Pronounce the Latin and Greek names of mushrooms any way that works for you, and if someone laughs at you, maybe you can think of some other names, in clear English, to pronounce for them. Nothing is worse than an English speaking mycologist who corrects people's Latin pronunciation. I mean, it's not like the "correct" pronunciation is anywhere close to the way Latin should be pronounced. For crying out loud, the "correct" pronunciation of Amanita in English rhymes with (I) "am a fighta" ("not a lova"). Those of us who suffered through highschool Latin recall our teachers' explanations about "Church Latin" ("vaynee, veedee, veechee" for veni, vidi, vici) and "real" Latin ("waynee, weedee, weekee"). Now we've got Mispronounced Mycological Latin to throw in the mix? And how about those antepenultimate syllable people who insist on stressing the second-to-last syllable every time? "Lie-AW-full-um" for Lyophyllum, and so on. When you ask them what they're doing (like, "Excuse me, what are you doing?") they tell you it's a rule. Ask them why they don't, therefore, say "stro-bill-OH-my-seas" for Strobilomyces, and they've got nothing. Because English is the international language these days (or because Americans and Brits are less open-minded about such things and the rest of the world finds it easier to just cave in), mycologists from countries that don't speak English have adopted the mispronunciations used by English speaking mycologists—though I suspect they secretly wince inside with every term. When not in the presence of English speaking mycologists, however, many pronounce the names in ways that are more reasonable—like, "ah-mah-nee-tah"—especially the mycologists from countries whose languages actually descend from Latin. |
|
|
Testing Chemical Reactions How a mushroom's surfaces, flesh, and spores react to the application of certain chemicals can be important information in the identification process. In some cases, nearly identical mushrooms can be easily differentiated by simply applying a drop of common household ammonia to the cap! It is important to test for chemical reactions on fresh mushrooms, preferably within an hour of picking them. This is not always possible, unless you are willing to carry chemicals with you when you're collecting. But try to test mushrooms as soon as possible when you get home, remembering that the longer you wait, the less reliable your results may be. Ammonia (NH4OH, Ammonium Hydroxide) Common household ammonia, available in any grocery store, works perfectly well. Ammonia is primarily used in the identification of boletes. Place a drop of ammonia on a fresh bolete's cap, stem, sliced flesh, and pore surface. Note any color changes that take place. Some species, like Xerocomus illudens, will demonstrate a quick flash of one color (for example, blue-green), then settle into another, more permanent color change (for example, grayish). Other species, like Boletus separans, may demonstrate a single color change. KOH (Potassium Hydroxide) A 3–10 percent aqueous solution is used to test for color changes. This chemical is available from online retailers. KOH is used in the identification of many mushrooms, including boletes, polypores, and gilled mushrooms. For boletes, place a drop of KOH on the cap, stem, sliced flesh, and pore surface. For polypores, apply the KOH to the flesh and the cap surface. For gilled mushrooms, place a drop on the cap surface. Note any color changes that take place. A change to yellow is sometimes found in species of Agaricus and Amanita; magenta or olive reactions can help identify species of Russula and Lactarius; deep red or black reactions can help sort out many gilled mushrooms; black reactions among polypores are crucial separators; and various colors are produced with boletes. Don't forget that a "negative" reaction (no color change) may also be an informative character! Iron Salts (FeSO4) A 10 percent aqueous solution is used to test for color changes. FeSO4 is available from online retailers. It is used primarily in the identification of boletes and russulas. For boletes, place a drop on the cap, stem, sliced flesh, and pore surface; for russulas, place a drop on the stem surface. Experiment! Mycologists have not tried applying these chemicals to every mushroom. You may discover interesting things by simply dropping these chemicals on mushrooms you collect. This kind of experimentation has led me to discover: that eastern North America's chanterelles do not react to iron salts with the exception of one species (Cantharellus appalachiensis) which is frequently hard to separate from other chanterelles on the basis of its physical appearance; that Rhodotus palmatus displays a striking green reaction to iron salts; that ammonia, KOH, and that iron salts are absolutely useless in sorting out morel species defined by DNA (or any other means). |
|
|
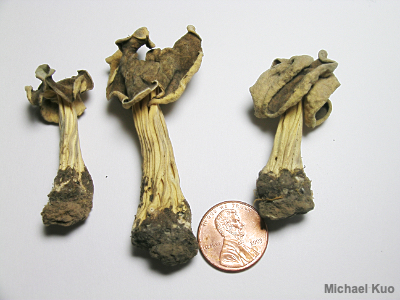
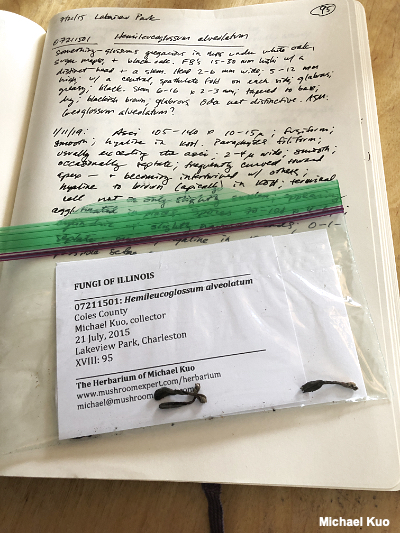
Preserving Specimens I can think of three reasons to preserve your mushroom finds. First, because it's fun—and any mushroomer who has ever caught the "collector's bug" for something besides mushrooms will find that collecting mushrooms is no different. Second, you will be glad you saved your mushrooms later, as your mushroom identification skills develop. You will be able to go back to identify mushrooms you were unsure of before, or reconsider identifications you made. You may find yourself using a microscope confidently, down the line somewhere, and you will be able to confirm or modify identifications you made in the past if you have saved the specimens. Third, saving your mushrooms is important to the science of mycology. Truth be told, relatively little is known about mushrooms. Hundreds, even thousands of species in North America are as yet undescribed. The range and ecological limits of many species are unknown. If you have kept a detailed journal entry for a mushroom and preserved the specimen, there is a chance that a mycologist may someday be truly interested in your find. Documenting Your Find Preserving a mushroom would be pointless without the accompaniment of a detailed journal entry describing the mushroom thoroughly, documenting its ecology, where and when it was found, and so on. See Describing Mushrooms and Keeping a Journal for information on how to go about making such a record. Illustrating your collections is also important. A sketch, drawing, painting, photograph, digital photo, or scan of your mushroom is a great idea, and it will make your collection more useful (to yourself and to others) later. Drying the Specimens You should attempt to dry small- to medium-sized mushrooms whole, if possible. Larger mushrooms will need to be cut into pieces; you may even find yourself discarding substantial chunks of a larger mushroom. Make sure, however, that you do not discard all the pieces of one of the mushroom's parts. Dry at least some of the cap, the gills or undersurface, the stem, the base of the stem, and so on. A commercial food dehydrator (available in most department stores or online for about $30) will dry specimens effectively. Keep the mushrooms clearly separated in the dryer. When dried they are not often going to look much like they did before, so you will want to make sure you know which mushroom is which. When I am drying more than one or two mushrooms, I put little pieces of paper next to each mushroom that help me remember. Experience will tell you how long to dry mushrooms; larger specimens, of course, take longer than small ones. Your goal is to dry the mushroom so that it is brittle. After you have turned the dryer off, remove the mushrooms and wait at least ten minutes before checking them. Sometimes mushrooms that seemed dry when you took them out of the dryer will soften up in this time period and become flexible; if this happens, dry the mushrooms for a longer time period. Do not dry mushrooms in your living quarters. Some people are allergic to drying mushrooms and can get headaches, or even break out in rashes, when they are around an operating mushroom dryer. When a food dehydrator is not available (for example, when you are traveling) you may be able to dry mushroom specimens using a lamp and a paper towel; see the instructions on this page. Storing the Specimens I recommend storing your mushrooms in sturdy plastic zip-lock bags. "Real" mycological collections are wrapped in acid-free paper and stored in special cardboard boxes, but the expense of such materials is prohibitive for most of us. Put the mushroom(s) in the plastic bag along with enough of a written record so that you can later figure out what's what, and what corresponds to your journal entries. This may not seem like much of an issue at first, but as your collection grows you will probably find that you need some kind of a numbering system in order to make sense out of anything. I put the following on a note card or piece of paper in each specimen bag:
You don't have to use my system, of course. The point is that you will probably need to use some system to keep track of everything. Store your collection in a dry location. The basement or the garage is probably not the best place for your collections, since dampness can destroy them. Share! When your collection begins to get larger, make sure you let people know it exists. Your specimens may be useful to the science of mycology. Let the local mycologist know of your collection's existence (and what's in it), publish a list of collected species names in your mushroom club's newsletter, and so on. Mycology is constantly in need of recent, well-documented collections of mushrooms! |
|
This site contains no information about the edibility or toxicity of mushrooms. Kuo, Michael (2019). Studying mushrooms. Retrieved from the Mushroomexpert.Com website: www.mushroomexpert.com/studying.html All text and images © , Mushroomexpert.com |